Designing a ring has traditionally required a trained CAD technician, a detailed brief, and at minimum a few days of back-and-forth. FormaNova’s Text-to-CAD feature compresses the blocking-out phase — the part where a designer is just trying to see if a shape works — to about ten minutes: type a description, wait while the AI architects it, and receive a complete, component-separated 3D ring model ready for material assignment, rendering, or further refinement.
This post walks through the full workflow, from prompt to final product image.
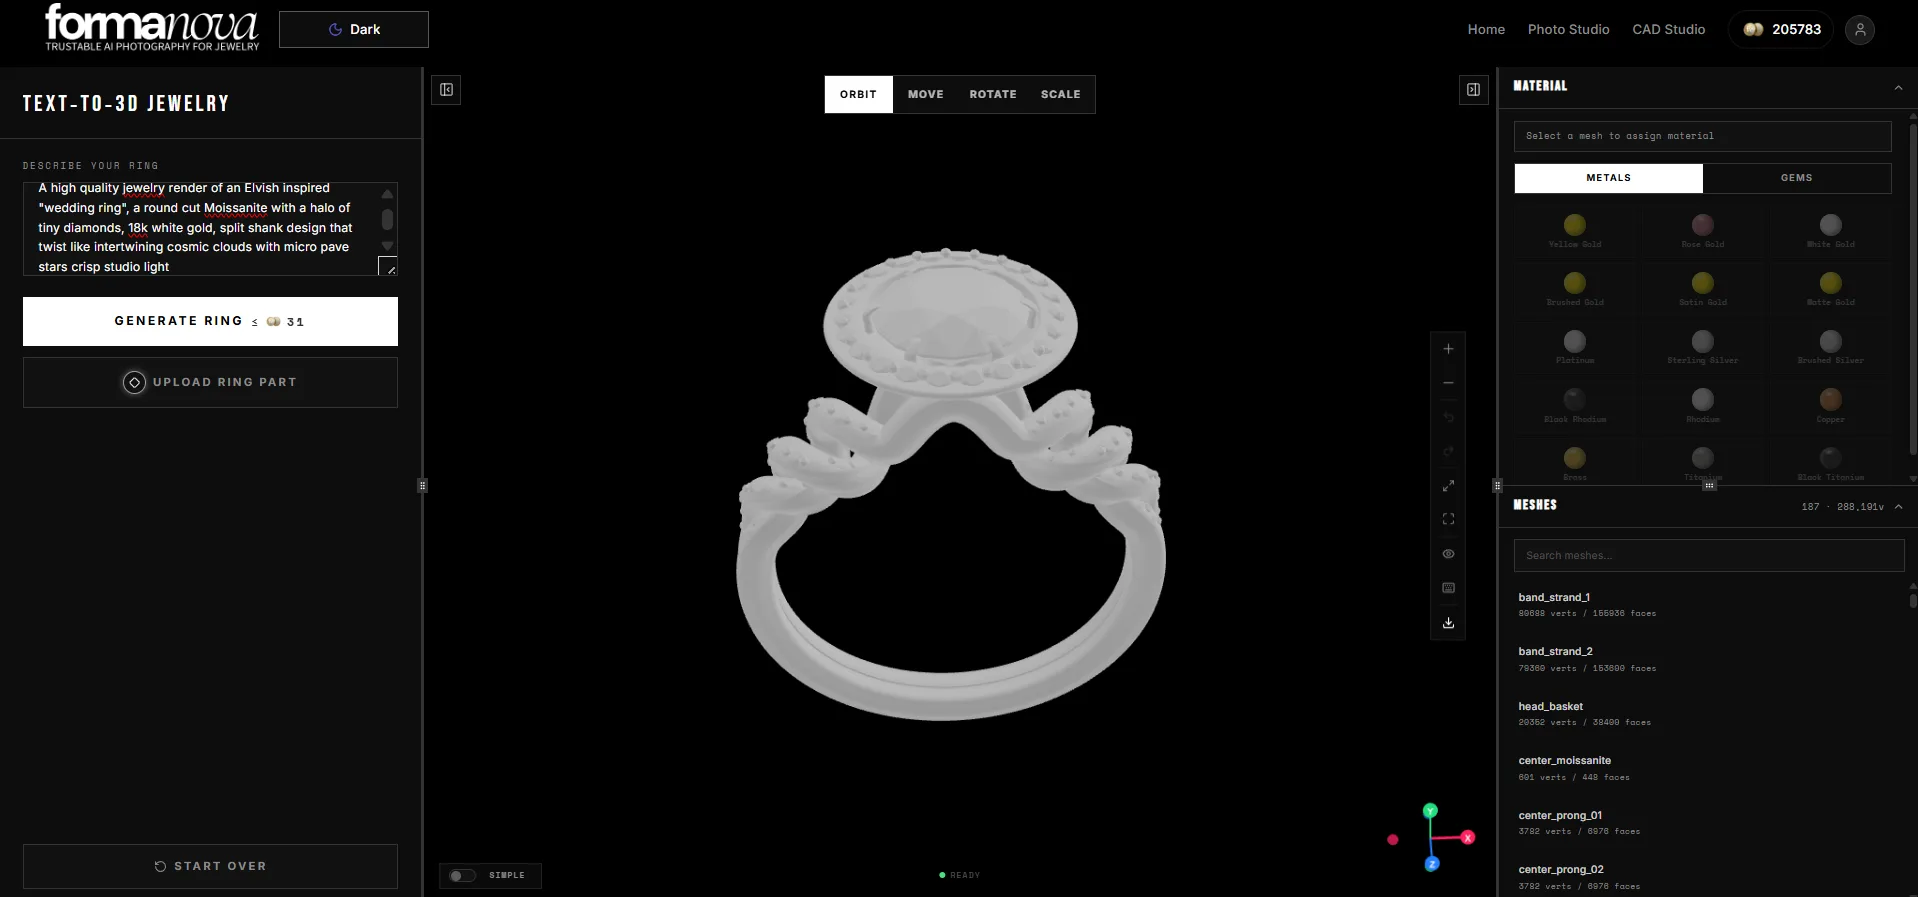
Step 1: Generate the Ring from a Text Prompt
Start at formanova.ai/text-to-cad.
Type a plain-English description of the ring you want. The prompt can be as simple or as specific as your design calls for:
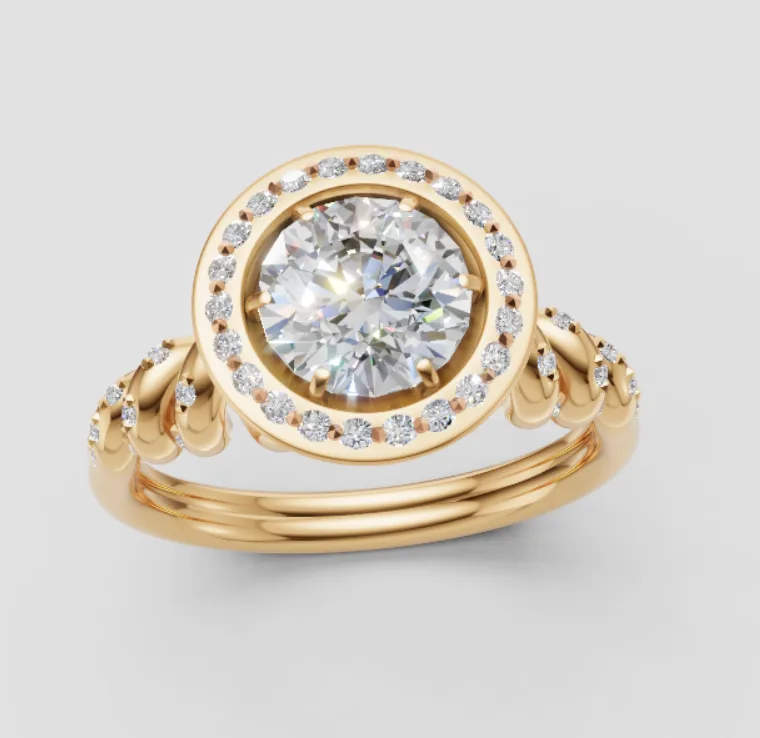
“Gold ring with an oval diamond and split shank band”
Then wait. This is not an instant generation — the model takes around ten minutes to build. That is the point.
A skilled Rhino designer typically spends two to four hours just blocking out a shape to evaluate whether it has the right proportions and feel. FormaNova produces that same starting point in a fraction of the time, and often with geometry that a human wouldn’t naturally draw — organic flows, unusual curvatures, structural choices that come from the AI’s spatial reasoning rather than a designer’s habitual CAD moves. If you are stuck in a creative rut or need to quickly explore multiple design directions before committing to one, that is where this tool earns its time.
Go grab a coffee while it runs.
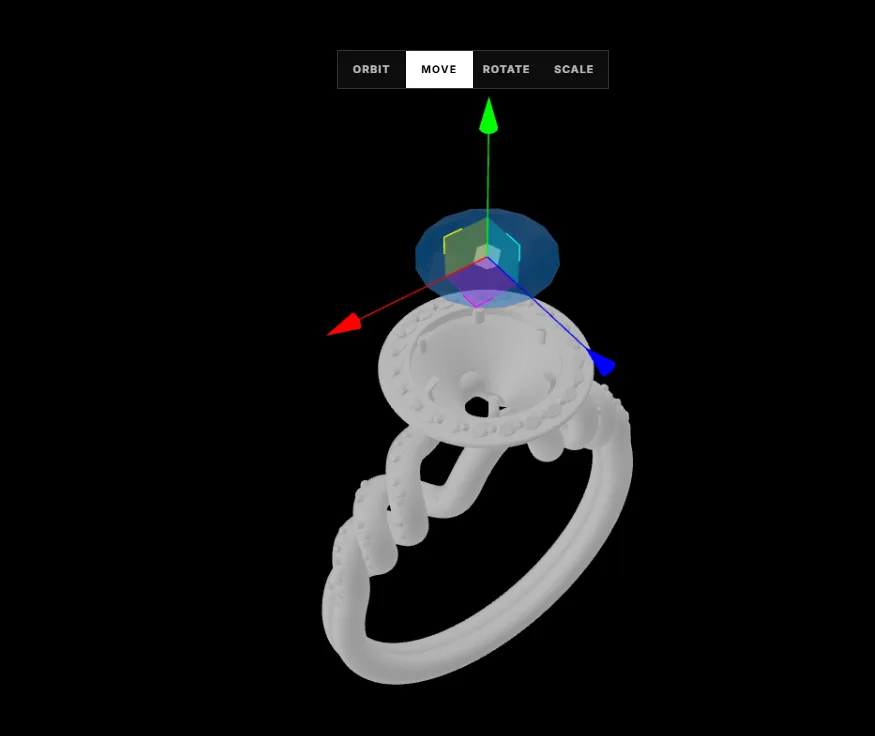
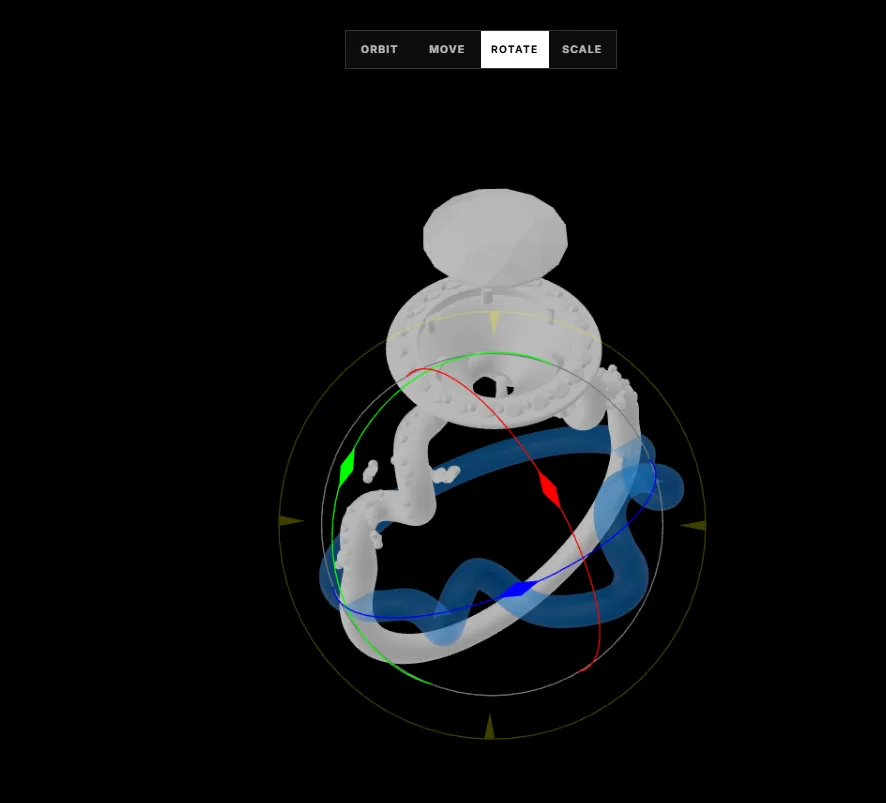
Step 2: Edit Components and Apply Materials
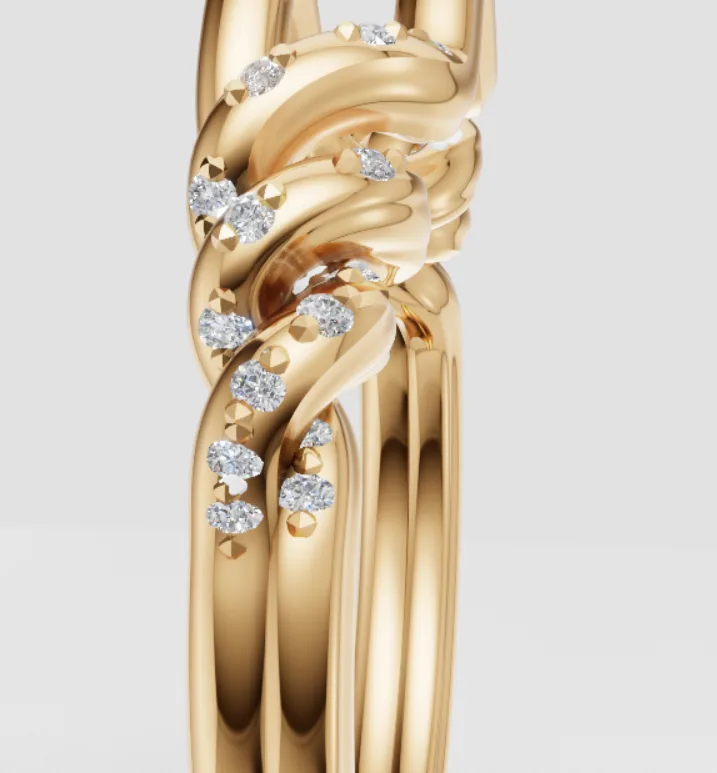
When the model arrives, it is not a single merged object and it is not blobby AI geometry. It is a kit of discrete parts: the band, the stone, the prongs, and any decorative elements each exist as independent mesh bodies within a single GLB file — essentially an assembly.
FormaNova’s Text-to-CAD generates ring models as an assembly of discrete mesh bodies — band, diamond, prongs, and decorative elements each independent — giving designers full object-level control without any destructive editing.
Inside FormaNova’s spatial editor, you can work with each component individually before you ever export:
- Move prongs without warping the band
- Reposition the stone
- Hide or delete individual components — for instance, remove the AI-generated diamond placeholder entirely and substitute a precisely-cut diamond from your own library
- Transform individual elements to adjust proportions
You can also assign basic materials before exporting:
Metals: yellow gold, white gold, rose gold, silver, platinum
Stones: diamond, ruby, sapphire, emerald, opal
These material assignments are preserved in the GLB export, so iJewel3D receives a fully specified ring — not a grey placeholder — and you can focus the iJewel3D session on render quality rather than starting material selection from scratch.
Step 3: Export as GLB
When the design is ready, export it as a GLB file. GLB bundles the full assembly — geometry, component structure, and material assignments — into a single portable file that works directly with iJewel3D and most downstream 3D tools.
Step 4: Import into iJewel3D
Go to ijewel3d.com and import your exported GLB.
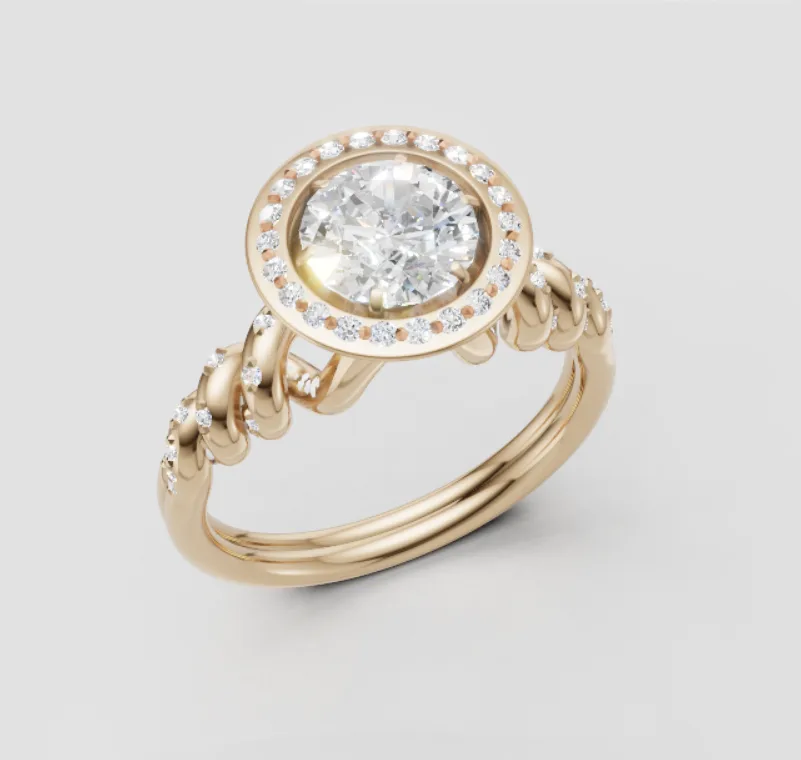
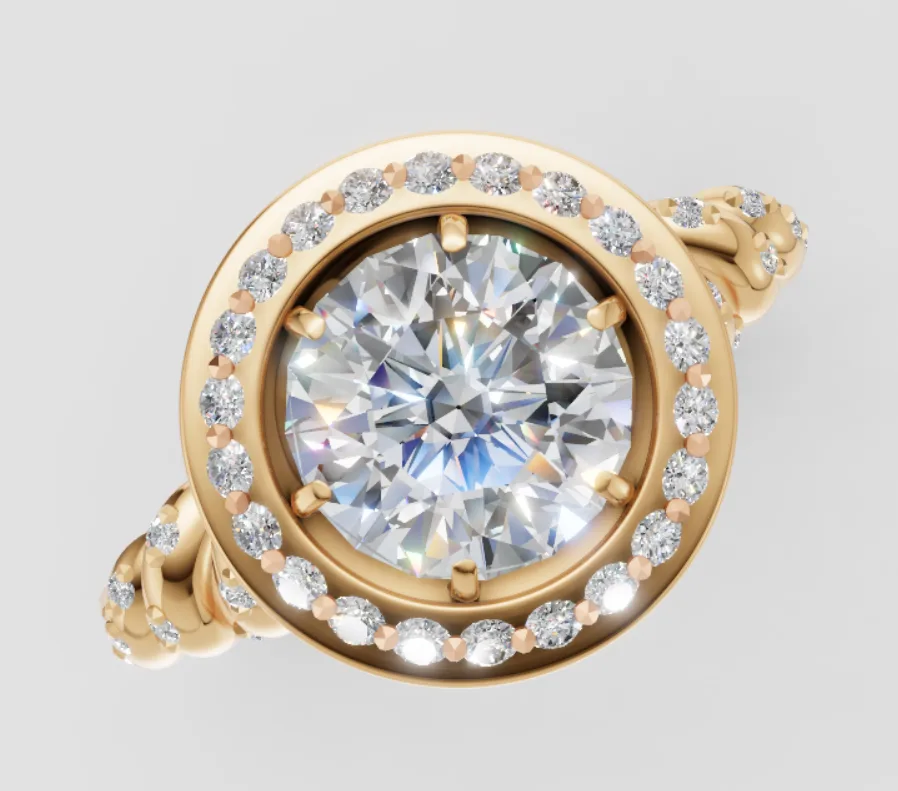
Your file already carries material assignments from FormaNova — metal type, stone type, and component structure. What iJewel3D adds is photorealism: physically accurate light behaviour, proper diamond refraction, metal reflectivity at render quality, and studio or HDRI environments that make the output look like a product photograph rather than a 3D preview.
iJewel3D is a browser-based rendering platform purpose-built for jewelry visualization. Generic 3D renderers on default settings tend to produce results that look like CGI. iJewel3D’s presets are calibrated specifically for the appearance of fine jewelry — the way gold reflects differently from platinum, how diamond facets split and bend light, how surface finish changes perceived quality at render resolution.
Step 5: Refine Materials and Set Up the Render
Even with base materials already assigned from FormaNova, iJewel3D gives you finer control over the properties that determine render quality:
Metal refinements:
- Reflection intensity
- Surface finish: high polish, brushed, or matte
Stone refinements:
- Refraction index — this determines how the stone bends and splits light. The correct refractive index for diamond (2.417) produces characteristic fire and brilliance; a wrong value makes the stone look like glass.
- Clarity appearance
Environments:
- Studio lighting — controlled and directional. Ideal for e-commerce product shots where consistency and clean shadows matter.
- HDRI environments — ambient environment maps that wrap the scene in realistic reflected light. Better for lifestyle and editorial use.
Step 6: Render
Configure your camera angle — product overhead, 45-degree, close-up of the stone — then render. Output options include:
- High-resolution static images (PNG, JPG) for product listings
- Interactive 3D embeds for e-commerce product pages
- Polished viewer links for client presentations and approvals
The full pipeline from FormaNova model to finished iJewel3D render typically takes under an hour once you are familiar with the material and lighting controls — and the majority of that time is the initial FormaNova generation.
For Designers Taking It Further: Rhino and 3D Printing
The GLB from FormaNova is a strong starting point for a professional CAD pass — not a finished manufacturing file. Because the geometry is a kit of discrete mesh bodies rather than production-grade NURBS solids, the intended workflow for serious manufacturing use is:
- Use the FormaNova model as a spatial reference and creative direction.
- In Rhino (or your preferred CAD tool), retopologize — trace the design into precise NURBS/STEP geometry using the AI model as your guide. The component-separated structure makes this straightforward: each mesh body corresponds to one part you will model.
- Swap the AI-generated diamond placeholder for a real, precisely-cut stone from your library.
If you want to 3D print directly from the GLB without a full Rhino pass, run a Boolean Union command first to fuse the separate mesh bodies into one solid piece. Most printers and print-prep tools require a single unified mesh.
FormaNova’s Text-to-CAD is a rapid ideation tool: it produces a 3D ring concept in approximately ten minutes that would take an experienced Rhino designer two to four hours to block out from scratch, with AI-generated geometry that often explores spatial forms a human drafter wouldn’t naturally arrive at.
The result is a faster path to “does this design work?” — leaving the precision manufacturing work, which still requires human expertise, to happen on a form that has already been evaluated and approved.
What This Workflow Replaces
The traditional path from ring concept to product image: brief to a CAD technician → file → revision round → rendering studio → revision → final image. Days to weeks, hundreds of dollars per design iteration.
The FormaNova and iJewel3D combination compresses the concept-to-render phase to a single session. For designers prototyping multiple directions, brands building a catalog, or clients who need to approve a form before committing to manufacturing, that compression is the product.
Summary
| Step | Tool | What happens |
|---|---|---|
| 1. Generate | FormaNova | Text prompt → assembly of discrete mesh parts (~10 min) |
| 2. Edit + Materials | FormaNova | Move, hide, delete components; assign metal and stone |
| 3. Export | FormaNova | GLB with geometry + material assignments |
| 4. Import | iJewel3D | Upload or drag-and-drop |
| 5. Refine + Lighting | iJewel3D | Fine material controls, refraction, studio or HDRI |
| 6. Render | iJewel3D | High-res output for listings, presentations, embeds |
Try it at formanova.ai/text-to-cad. No CAD skills required to get a direction worth refining.